Help
ERM User Guide
Ethics Review Manager (ERM) is used at Monash University for applications to the Monash Institutional Biosafety Committee (IBC), Monash University Human Research Ethics Committee (MUHREC), and Monash Animal Ethics Committees (AECs).
Refer to the relevant team in the Office of Research Ethics and Integrity (OREI) for further guidance when completing application forms in ERM.
Click on the links below or use Ctrl + F to search this page for help navigating the system.
Your ERM WorkArea
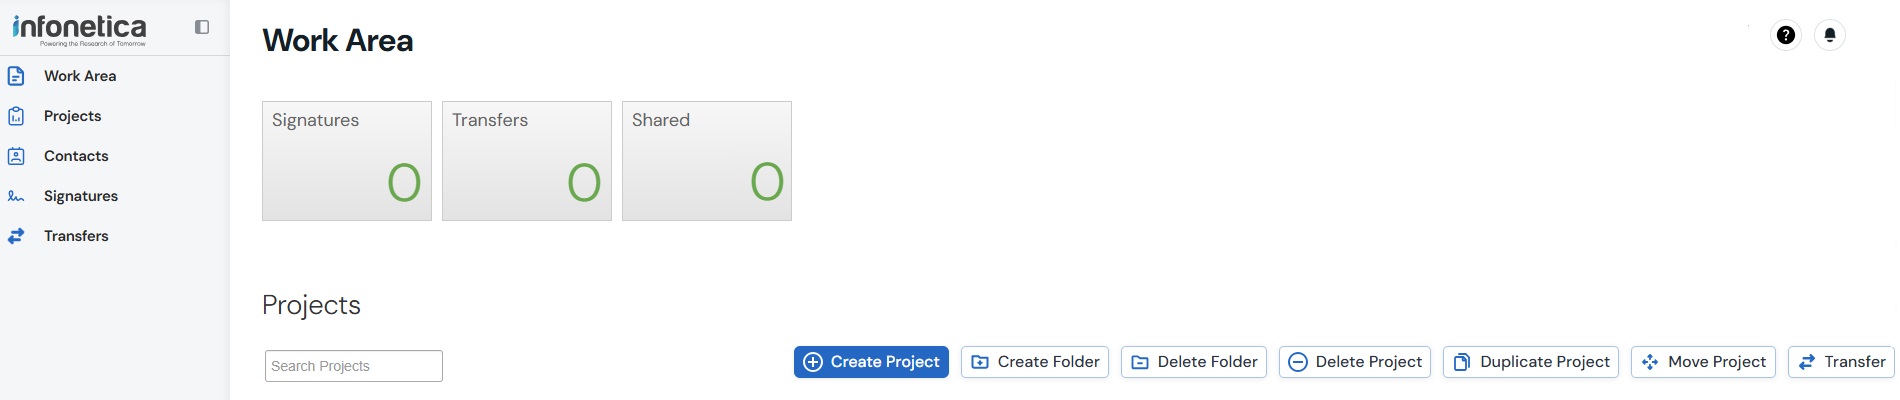
WorkArea Actions
Create Folder - Organise projects in your WorkArea
Delete Folder - Remove an empty folder if no longer required
Create Project - Create a new application - see Creating a Project
Delete Project - Remove an unsubmitted application if no longer required - see Deleting a Project
Duplicate Project - Create a copy of an application. Only the Project Owner can use this function - see Duplicating a Project
Move Project - Move projects into folders as required
Transfer - Transfer ownership of a project to another user - see Transfers
Help - includes contact information for the relevant Research Offices, FAQs, and Template documents to assist you in completing an application
Notifications - displays items requiring your attention - see Emails and Notifications
Where projects have been filed into a custom folder, you must open the folder and use the Action buttons within the folder to duplicate, delete or transfer.
Project Folders and Project List
If a folder is created using the Create Folder button, a Project Folders section will appear including an All Projects tile. Projects not assigned to a folder will appear below in the Project list.
Projects can be dragged from the project list into a folder.
Click the arrow next to the project title to open the project details and view sub-forms created within the project.
Emails and Notifications
System Emails are sent from donotreply@Infonetica.net
The emails you receive are dependent on the role you are assigned to a project. All listed investigators will receive receipt, approval, and closure emails. Only those with access to edit the project (i.e. those who have been assigned a role) will receive emails advising them of reviewer comments, reminders etc.
You cannot unsubscribe from system emails, however, if you believe you are receiving emails in error, contact the Project Owner listed in the email and ask them to remove you as a collaborator on the project.
System Notifications are sent at the same time as system emails and serve as a quick reference point in your WorkArea. You can open the relevant projects by clicking on the notification. You can delete notifications, mark them as read/unread and flag them as important.
Preparing a New Application
Refer to the Office of Research Ethics and Integrity (OREI) website for advice on whether or not you need to submit an application, and guidance when completing a new application form.
Creating a Project
Starting in your WorkArea:
- Click Create Project
- Enter the project title, select the required form in the dropdown list, then click Create

The project homepage will now appear
- Click Start Here to begin completing the form
- Work through the form using the Previous and Next buttons
- Click Navigate to return to the project homepage
- Click Completeness Check to ensure you have completed all mandatory questions
- Check the correct person is listed as Chief Investigator - if not you will need to transfer before submitting
- To submit an application for review, click Submit. Then click Submit again in the subsequent pop-up screen. All investigators listed on the application will receive an email receipt within 15 minutes of submission.
If you cannot see the submit button:
- Click Collaborators to see whether you have been given access to submit by the Project Owner. If you have read-only access, or full-access except the ability to submit, the Project Owner will either need to edit your access to the project or click submit themselves.
- If you have access to submit, but cannot see the submit button, check for a red warning banner across the top of the project home screen. If you can see this, click Update to enable the submit button to appear.

Adding Personnel
The Chief Investigator details will auto-populate from the profile of the Project Owner (the person who has created the project). If this person should not be listed as the Chief Investigator, the project will need to be transferred to the correct person prior to submission.
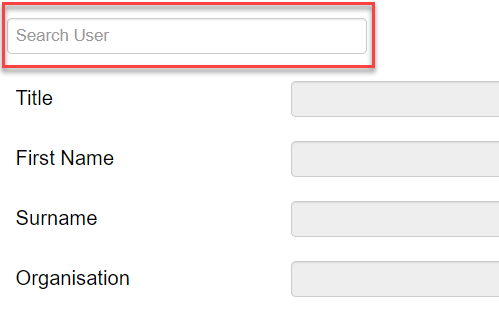
To list Monash investigators and/or students:
- Search by typing a Monash email address into the Search User field
- Double-click or hit the Tab button on your keyboard to add their details to the form
- Use Add Another beneath the last person in your list to add more investigators.
If the investigator’s name is not found using the search function, they need to log in and out of ethicsapps.monash.edu to activate their ERM account – they will then appear in the search list.
Contact details are retrieved from the Monash University Identity Management System and cannot be edited within the form.
External personnel must be entered manually.
Listing an investigator on an application does not give them automatic access to the project in ERM. You must also assign them a role to provide them with access.
Removing Personnel
To remove an investigator click Remove beneath the person you wish to remove. The contact details will highlight in red indicating the person to be removed.
For mandatory roles, e.g. Deputy Chief Investigator, you can not remove the person listed. Instead, you will need to use the Search User bar to enter the name of the person who will be taking on the role. Once selected, this person’s details will overwrite the details of the original investigator listed in the contact block.
If the person you are trying to remove is the only person listed in the section i.e. if there is only one student listed, and you are trying to remove this person, you will not see the remove button. Instead, you’ll need to untick the relevant tick box above to remove the section from the form.
You cannot remove the Chief Investigator (Project Owner), but you can Transfer ownership of the project.
After amending personnel, you should review the Collaborators tab to ensure that only the required people have access to your project.
Sharing a Project with Monash Collaborators
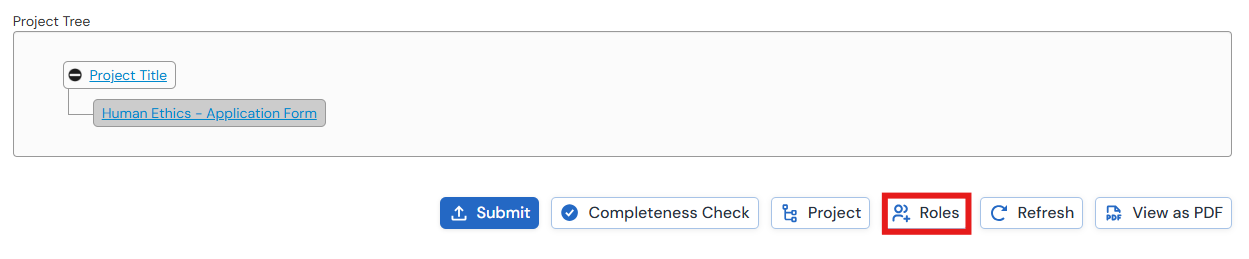
To assign a role:
- Open a project in your WorkArea
- Click Roles in the Actions. You must have the main form selected in order to see this button
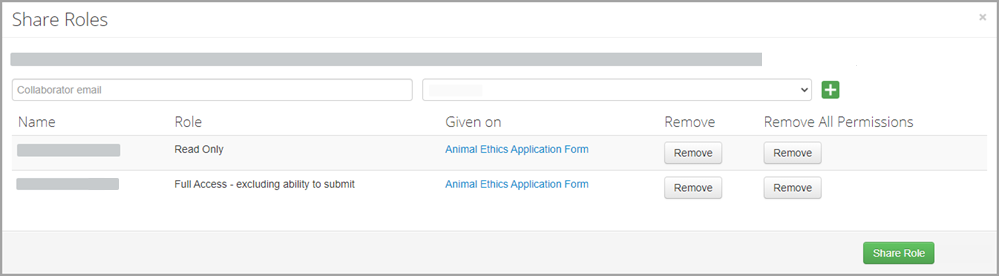
- Enter the collaborator's email address. This must be a Monash email address
- Select the required role from the dropdown list. The selected role will apply to the entire project - that's the main form and all existing and future sub-forms.
- Use the green + button to list additional collaborators and assign their role
- Click Share Role to save.
To remove a collaborators role:
- Click Roles to view all collaborators who have been assigned roles on the selected project. You must have the main form selected in order to see this button.
- Click Remove to remove a specific role that has been assigned to a collaborator, or, if the collaborator has multiple roles and is therefore listed multiple times, you can click Remove All Permissions for this person. If a collaborator is listed multiple times, the role with the highest level of access will apply.
You can not edit an existing role, but you can remove roles and re-assign a new role if required.
Only Monash staff/students can be assigned a role and given access to a project in ERM. If you need to share a project with an external collaborator, you will need to download a PDF of the application and send it to them via email.
Adding Comments
Investigators can write comments to other investigators regarding specific questions within the application (e.g. a student wanting to check their response to a question with their supervisor before submission). These comments will only be visible to other investigators with access to the project and are not visible to Committee Members or the Ethics/Compliance Office.
- To add a comment, click the Comment bubble to the right of the relevant question
- Click + Add Comment and type the comment you wish to make then click Save
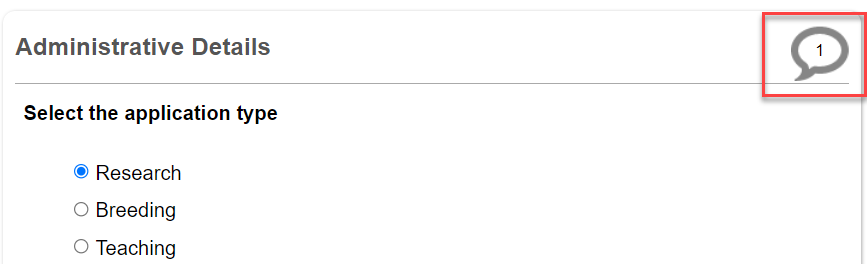
Click on the comment icon to view/edit the comments.
You can view a list of all comments by clicking Comments in the overview panel.
Responding to Reviewer Comments
Following review, you will receive an email if the Committee requires further information. Reviewer comments will be sent to you via ERM, and you are required to address them directly within the application form.
- Open the project
- Click Reviewer Comments in the overview panel on the right hand side. The number will indicate how many comments you have been sent
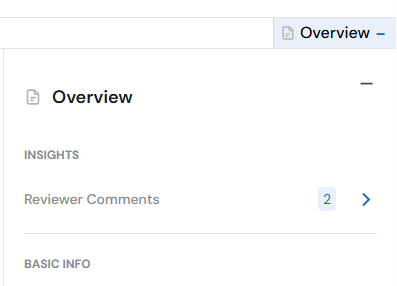
- Click on the first comment in the list to navigate to the relevant question in the form.
- You can read the reviewer's comment again from the relevant section of the form by clicking on the Reviewer Comments bubble to the right of the question. The left bubble displays reviewer comments; the right bubble displays comments between investigators.

- Amend the relevant sections of the form as required. Do not make any other changes than those requested by the reviewers.
- Changes to documents should be made using track changes and uploaded in the relevant sections of the form with a new date and version. Delete any previous versions.
- If you would like to provide further information to the AEC or explain why you have not made requested changes, please send this through in an ERM correspondence. The AEC Secretary can then provide that as additional information to the AEC when they review the changes.
- Once complete, click Submit, and again in the subsequent pop-up screen.
All investigators listed on the project will receive an email receipt upon submission.
If you cannot see the submit button:
- Click Collaborators to see whether you have been given access to submit by the Project Owner. If you have read-only access, or full access except the ability to submit, the Project Owner will either need to edit your access to the project or click submit themselves.
- If you have access to submit, but cannot see the submit button, check for a red warning banner across the top of the project home screen. If you can see this, click Update to enable the submit button to appear.
Compare with Previous Submission
To view all changes made to a submission since the previous submission:
- Open the Project, then open a page of the form
- Click Compare with Previous Submission

- Any changed questions will be listed on the This Page, or All Changes tab
- Removed responses will be highlighted in red, whilst new content will be highlighted in green.

- Changes made by all collaborators with edit access will be listed.
- Changes may include new questions added or removed due to form updates.
- The form is not editable when viewing changes compared to the previous submission. If you wish to make edits, click Return to Edit Mode
Managing your Project
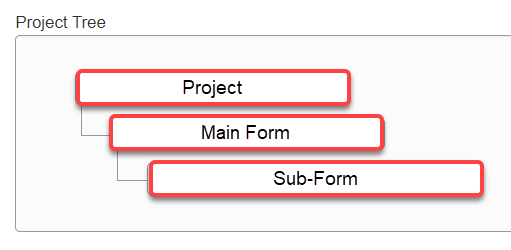
In the project view, the project tree displays the forms which have been created for a particular project.
- The top (Project) level displays the Project title
- The second (Main Form) level displays the main form type that was selected when the project was created
- Any forms listed beneath the main form are referred to as sub-forms. These include incident reports, annual reports etc.
- The second (Main Form) level displays the main form type that was selected when the project was created
Clicking on any form in the list will display the form status details and the form contents in the navigation section below.
Action Required on Form
If yes - click Yes to view a list of the remaining mandatory questions which are yet to be answered
If no - all mandatory questions are complete and the form is ready to be, or has already been submitted
Form Statuses
| Not Submitted | Application has never been submitted |
| Submitted by Applicant | Application has been submitted but has not yet been assigned for review |
| Under Review | Application is under consideration by the relevant committee |
| Further Information Required | Reviewers have provided comments which need to be addressed before the application is submitted again |
| Approved | Application is approved |
| Approved with Condition | Application is approved but specific conditions apply. Refer to the conditions on the approval email |
| Expired Pending Final Report | Project has expired. A final report must be submitted in order to close the project |
| Closed | Project has closed. No further work is to be conducted under this approval |
Corresponding with the Committee Secretary
The correspondence function enables researchers and committee secretaries to send messages regarding specific projects in ERM. This is the preferred method of communication about specific projects since all messages are saved within the system and it's clear to both parties which project a message is referring to.
When a committee secretary sends you a correspondence message, you will receive an email with the subject 'ERM Correspondence Received'. To read the correspondence, click on the link in the email to navigate to the project, or open the project and click on the Correspondence Tab.
Close the message and click New Correspondence to reply.
To send a new correspondence message:
- Open the relevant project.
- Click on Correspond
- Enter a message for the Committee Secretary
- To attach a file, click Choose Files and follow the prompts. You can attach multiple files if they are stored in the same folder.
- Click Send. The system automatically generates a notification to the Ethics/Compliance Office.
To view previous correspondence, click the Correspondence Tab
Correspondence messages can only be sent on projects that have been submitted. If you have a query regarding an application which you have not yet submitted, contact the Committee Secretary via email.
Correspondence messages sent by the Committee Secretary will only be sent to those with collaborator access to the project.
Transferring Project Ownership
The person that initially creates the project is the Project Owner and is automatically listed as the Chief Investigator in the form. The Project Owner (Chief Investigator) must be the lead Monash supervisor with overall responsibility for the project. This person cannot be a student.
Project ownership can be transferred; however, this process removes the current Project Owner from the project. If this person is still involved with the project, it is advised that they add themselves to the project in the relevant section before transferring the project to the new Project Owner.
After acceptance of the transfer, the new Project Owner can then provide collaborator access to the previous Project Owner as required.
To transfer a project:
- In your Work Area actions, click Transfer. Where projects have been filed into a custom folder, you must open the folder and use the Action buttons within the folder to duplicate, delete or transfer.
- Enter the email address of the new Project Owner. This must be a Monash email address
- Select the relevant project from the list
- Click Transfer to complete the action. The new Project Owner will receive an email to inform them of the transfer request.
To Accept or Reject a Transfer:
- Click on the link in the transfer request email,
- Or, if beginning from your WorkArea, click Transfers then click View Project
- In the project actions, click Accept Transfer or Reject Transfer
- If the transfer is accepted, the project will now appear with the WorkArea project list of the new Project Owner. The previous Project Owner will no longer see this project in their project list. The new Project Owner may need to provide them with collaborator access
Transfers of approved projects require an amendment to be submitted.
Printing/Downloading an Application
To print/download an application form:
- Open a project
- Click View as PDF
Optional: As tabular summaries - displays tables rather than standard form layout for questions where this feature is enabled.
To print the form and all (or selected) attachments:
- Click Documents
- Untick any documents that are not required in a printed view
- Click View Selected to print. Or click Download All to download a ZIP file of the application and all selected attachments.
Duplicating a Project
Project Owners are able to duplicate the content of an existing project into a new application. This function is useful if you have multiple projects with similar content, or if you need to replace an expired application.
Do not duplicate a form to submit an amendment to an approved application.
Do not duplicate a Human Ethics form if the original Project was created prior to 1/8/25
Do not duplicate a Gene Technology form if the original Project was created prior to 1/7/22
Do not duplicate an Animal Ethics form if the original Project was created prior to 1/10/22
All form content will be duplicated into the new project except for any attached documents which will need to be uploaded manually. Animal Ethics users will also need to manually update the Animal Ethics tab since species information cannot be duplicated.
- In your Work Area click Duplicate Project. Do not select 'including sub-forms'.
- Enter the new project title
- Click Duplicate
- Edit and submit the new application – ensure that all information duplicated is relevant to the new application. Do not upload legacy files or previously approved amendments – if these are still relevant, the content should be added to your responses to the form questions so that your new application can be reviewed as a standalone application.
Deleting / Withdrawing an Application
If you have an approved project, which you would like to close or amend you do not need the delete or withdraw function. Instead, refer to:
If you have started an application but have not yet submitted it (i.e. the status displays 'Not Submitted'), you can delete it if you no longer require it
- In your Work Area actions, click Delete Project in the action panel
- Select the project you wish to delete from the drop-down list
- Click Delete
If you no longer require an application which you have submitted but is not yet approved, you are able to withdraw it if the status displays 'Further Information Required'. If you simply wish to make a change to your submitted application, do not withdraw the application, instead contact the relevant Ethics/Compliance Office for advice.
- Open the relevant project
- Click Withdraw in the Actions
- Add a note to indicate why you are withdrawing the project
If you cannot see the withdraw button, contact the relevant Committee Secretary for advice.
Submitting an Amendment
Amendments must be submitted and approved by the relevant Committee prior to implementation.
Amendments are made directly to the application form within ERM. Amendments can be made by the Project Owner, or by anyone who has been granted edit and submit access by the Project Owner.
- Select the project you wish to submit an amendment for.
- Click Unlock for Amendment in the Project actions.
- You will receive an email from donotreply@infonetica.net with instructions for submitting the amendment.
- Changes to documents should be made using track changes, and uploaded in the relevant sections of the form with a new date and version. Delete any previous versions (except for previous amendment summaries).
- Open the Amendment Details page and follow the instructions on this page to ensure you complete the relevant form sections before submitting your amendment. You will no longer need to attach an amendment summary document. This page serves as a log of all amendments. For any subsequent amendments required after the initial amendment listed on this page is approved, ensure you click Add Another to create another amendment submission. Do not over-write any amendments previously approved.
- Click Submit to send your amendment for review.
All investigators listed on the application will receive an email receipt upon submission.
Submitting a Report
Where applicable, annual reports, final reports, research reports and incidents or adverse events are submitted in ERM as a sub-form of the main application. All sub-forms linked to a project are listed beneath the main application form in the Project Tree.
Only the Project Owner or collaborators with full access are able to create sub-forms.
Sub-forms can only be created once the main form has been approved.
- In your Work Area, open the project you wish to submit a report for
- If you can see a red banner advising the project needs to be updated, click Update.
- Click Create Sub-Form in the project actions
- Select the relevant report from the dropdown list
- Complete the form
- Click Submit
All investigators listed on the application will receive an email receipt upon submission.
Closing a Project
Projects should be closed once the work is complete, or if the investigators are no longer at Monash.
To close a project, submit a final report.